Configurable Oscar statue for self-printing on 3D printer
Design idea
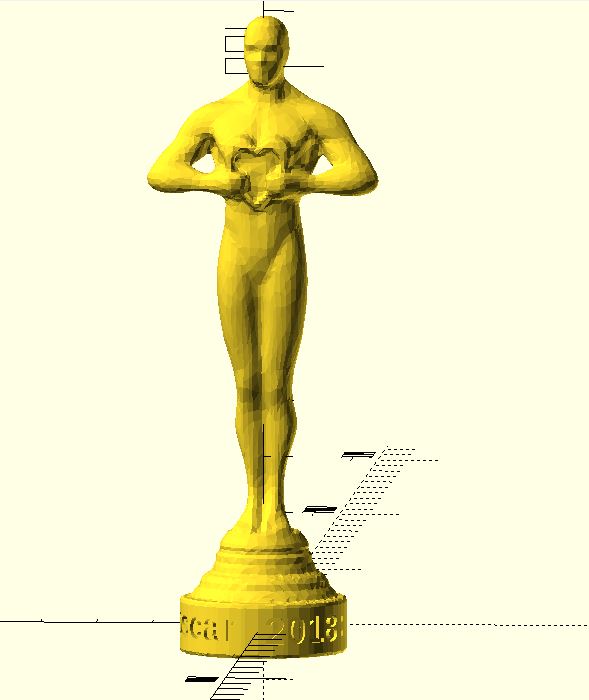
At the annual Oscar ceremony, these decorative Oscar trophies are presented. I wanted to create a statue based on this design, which should be configurable and of course also 3D-printable.
I wanted to give this object as a gift to a good friend, as a thank you that he has produced our wedding film so wonderful.
Realisation
The original template of the Oscar statue is available in the Internet in various image formats. Starting from a good photo, I began to be creative with excellent help of Opensource 3D software Blender.
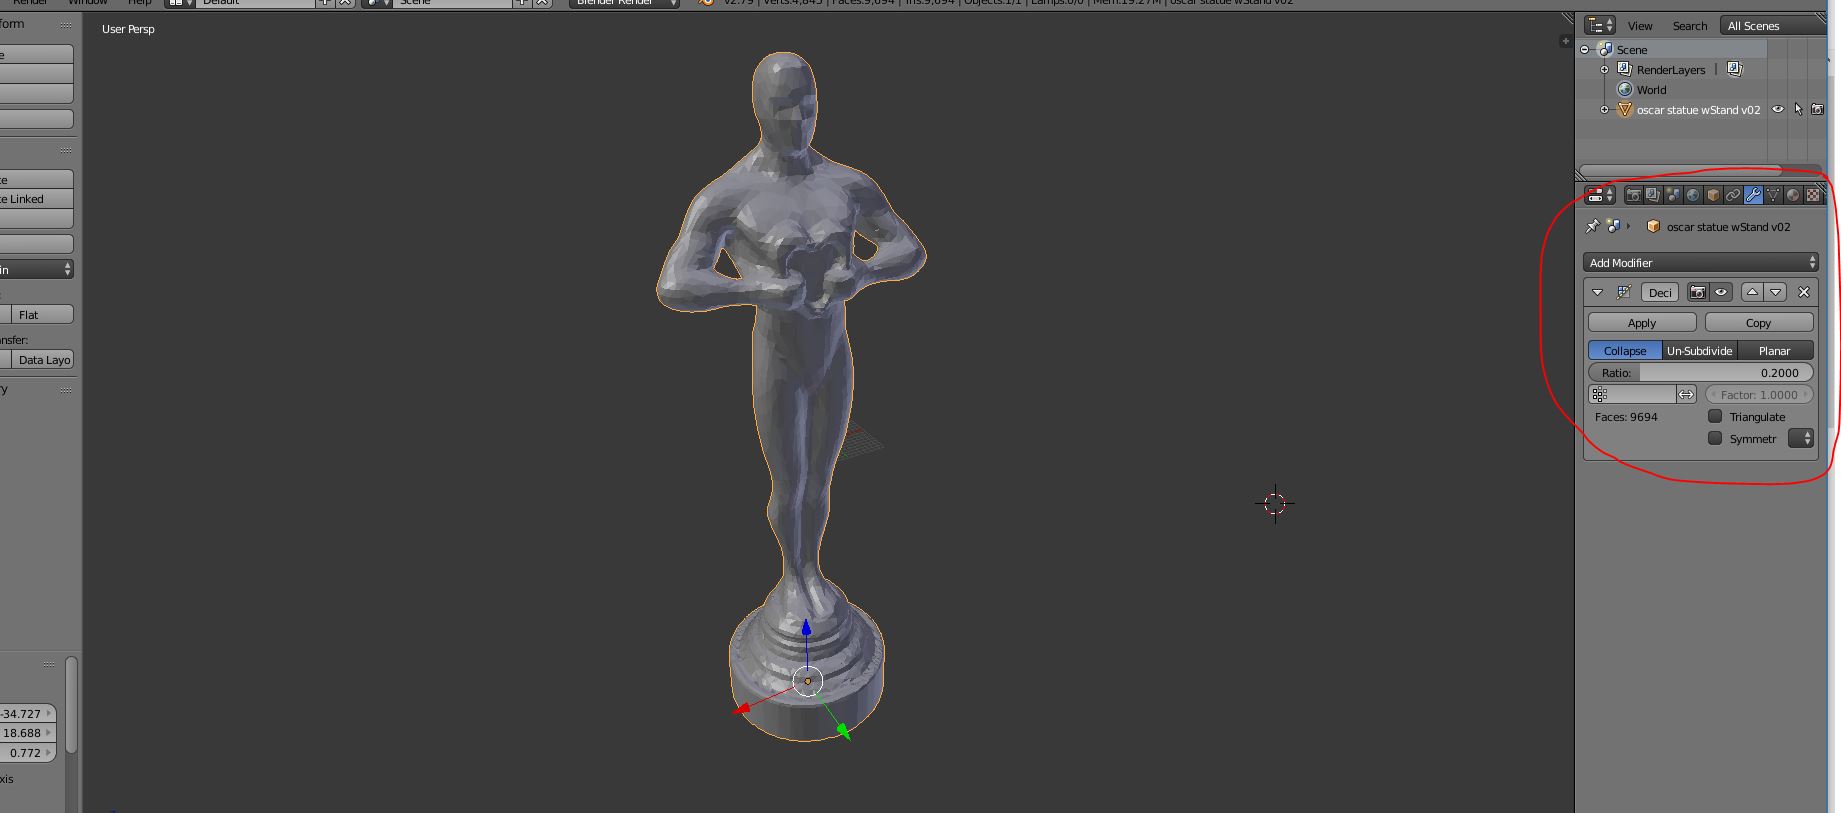
Blender is freely available as software and can be downloaded for free at blender.org. This gives you a lot of possibilities to get creative in 3D. However, the software is not “self-explanatory”. Therefore, as a blender beginner it is recommended to get acquainted with the immense variety of functions of this tool. There are a lot of good tutorials and tutorials on the net here, youtube is a hot tip here, as there are some very good video tutorials on Blender available. But I did not only need the design as a blender model, but it also needed the Labeling of the socket should be configurable, yet another very useful CAD tool had to be included. The open-source tool OPENSCAD can be used to create geometric bodies using a programming language. The bodies can be parameterized at runtime via appropriate OPENSCAD customizers via appropriate program parameters or variables. OpenSCAD is also available as a free download via openscad.org.
In any case, I recommend that you download the latest version as a development snapshot, as the stable versions currently do not have the customizer functionality. Tutorials are again very abundant in the network. Especially recommended for beginners are the tutorials available on the OpenSCAD homepage.
Last but not least the Blender model had to find its way into the OpenSCAD environment. By default, Blender does not offer the option to export models in OpenSCAD format. However, a corresponding add-on is available via github. After the download and successful installation of the add-on in Blender you have the option in the export menu of Blender to select the format openscad. Thus the generated file can be opened in OpenSCAD. In OpenSCAD, the model structure is available as a polyhedron body. The net- structure of the model is stored via corresponding coordinates in the form of a multimatrix. In order to provide the socket with configurable writings, the program code generated from Blender has been correspondingly supplemented in OpenSCAD and provided with parameters for the OpenSCAD customizer:
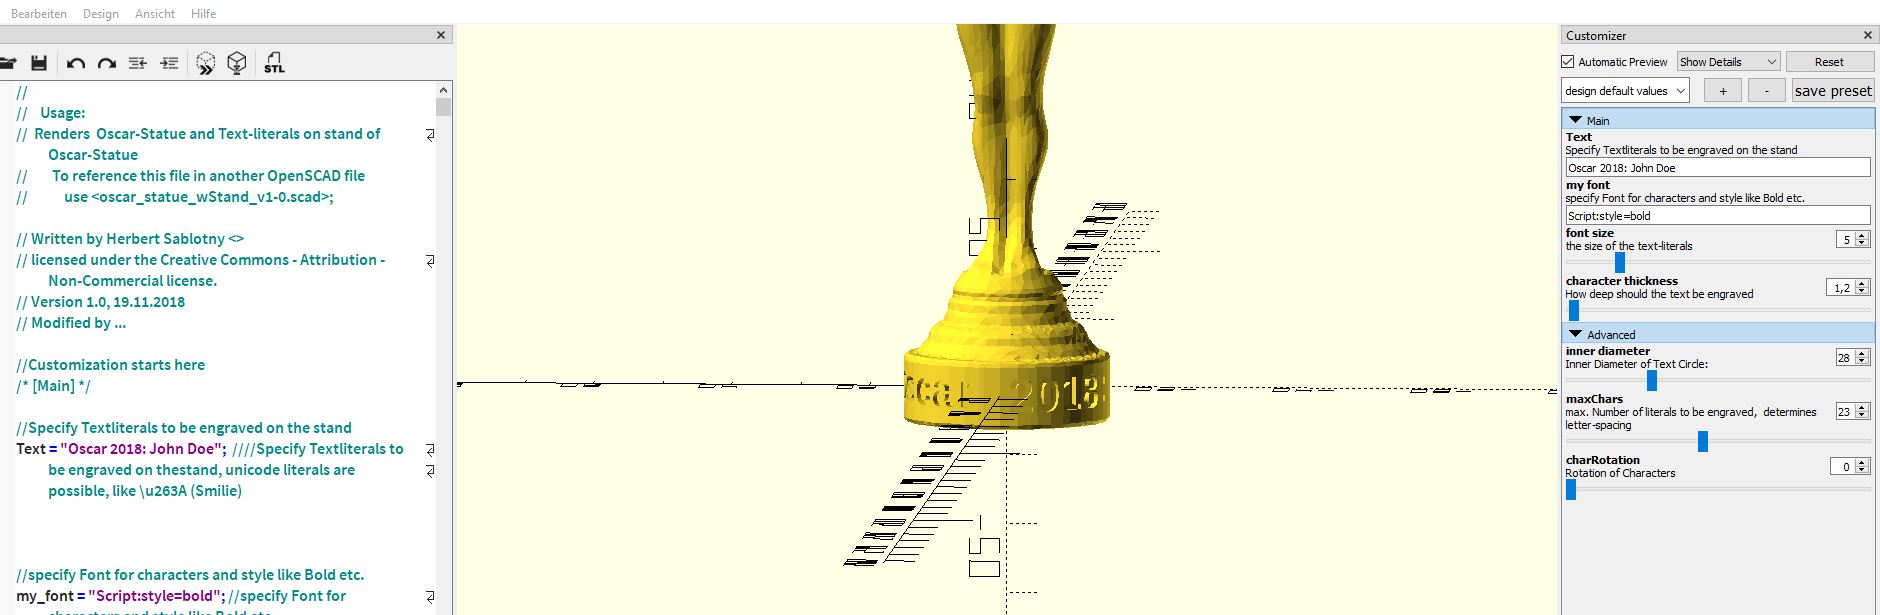
As a parameter, besides the text line, I have made available also other parameters such as font and font size. This allows the socket to be largely labeled or configured as desired. In OpenSCAD, the program code can also be adapted by the user at will to his own interests, so there is still room for further changes and improvements.
Once the parameters have been set via the customizer, an STL file can be generated from OpenSCAD for 3D printing. However, due to the complexity of the multimatrix of the Oscar model, the rendering takes a little longer, depending on the performance of the computer being used. On my DELL G3 laptop with Core i7 8.Gen. CPU and GTX1060 graphics card as well as 32GB RAM it’s relatively fast, after about 10 seconds the rendering is finished.
Since OpenSCAD is also the basis for the customizer provided by thingiverse ONLINE, the model available on thingiverse can also be configured directly online on thingiverse.com. However, I only use OpenSCAD locally on the PC for the corresponding OpenSCAD models, because the thingiverse customizer online in my browser is unfortunately not reasonably usable.
3D-Print
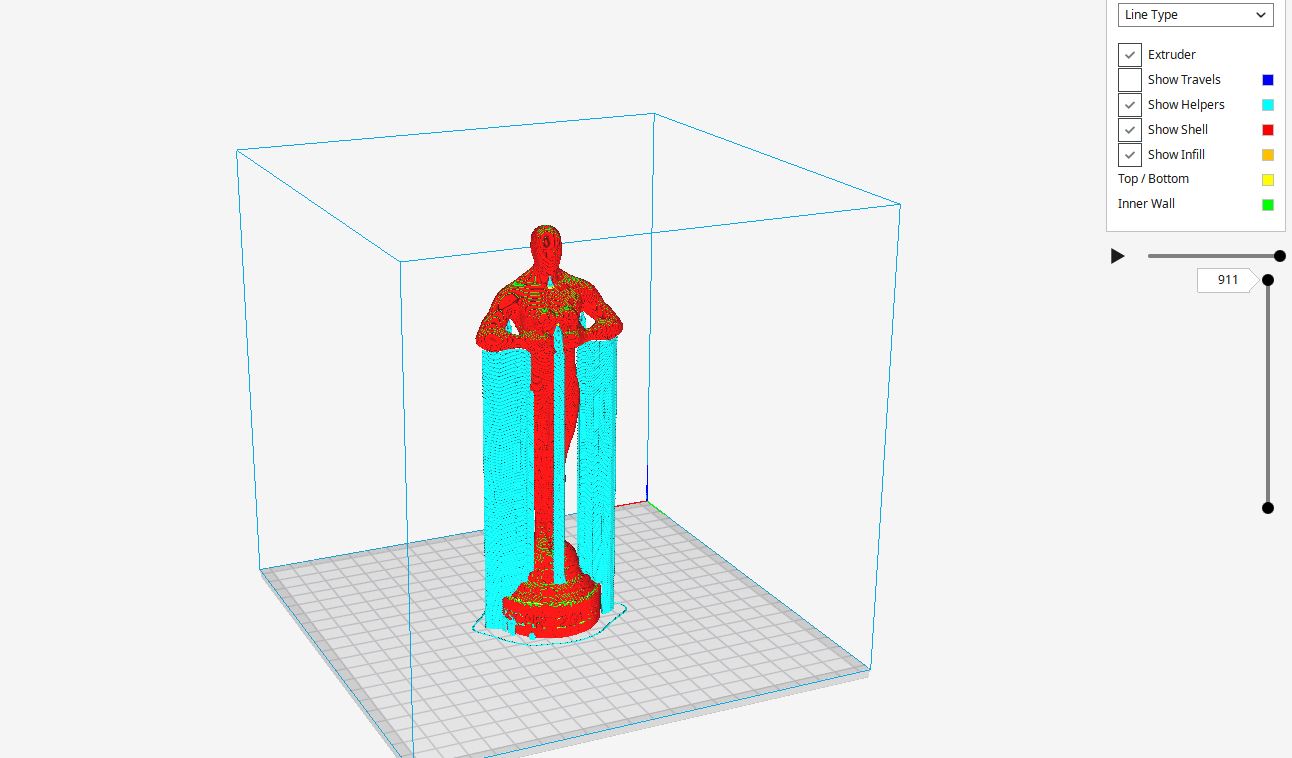
The 3D printing of the STL file generated from OpenSCAD was then prepared using the slicer software CURA. In Cura I have set the layer thickness to 0.2mm, 10% Infill is absolutely sufficient. I added a PAUSE-AT-HEIGHT extension to change the color of the filament after printing the base. I also had to print support because the overhangs on the model’s arms were too big:
Overall, the print on my anycubic i3 mega 3D printer took just under 4 hours.
The result is published as make on thingiverse.com
The openSCAD-Object is available as download on thingiverse:
Link to openSCAD-object on thingiverse

Comments